


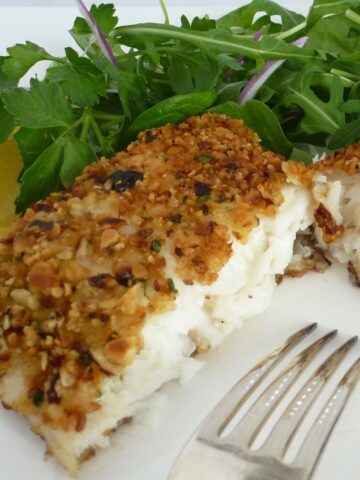
This is hands down the best gluten free breading for chicken! There are three components to it and they're all important to make a breading that sticks to the chicken and has the light, crisp coating that everyone wants.
Best of all this basic recipe can be varied by adding spices to the cornstarch coating.
The breaded chicken can also be frozen and it's still nice and crispy every time.
What is the best gluten free flour for breading chicken
Here’s the secret, gluten free flour is not the best choice for breading meat. You can make gluten free breading without flour and that’s actually what works best.
Wheat flour does three things; it thickens, coats and creates structure. In recipes where you want a coating to adhere to your meat cornstarch works best. It absorbs moisture from the meat helping the final coating to stick to it. Starches also help with browning and crispness, two things we want in breading.
Cornflake Cereal Breading
I love variety so I make other recipes with different gluten free breading but this recipe is the go-to breading in my house. It works perfectly for pork chops, pork schnitzel (shout out to Shrek fans) and any cut of chicken.
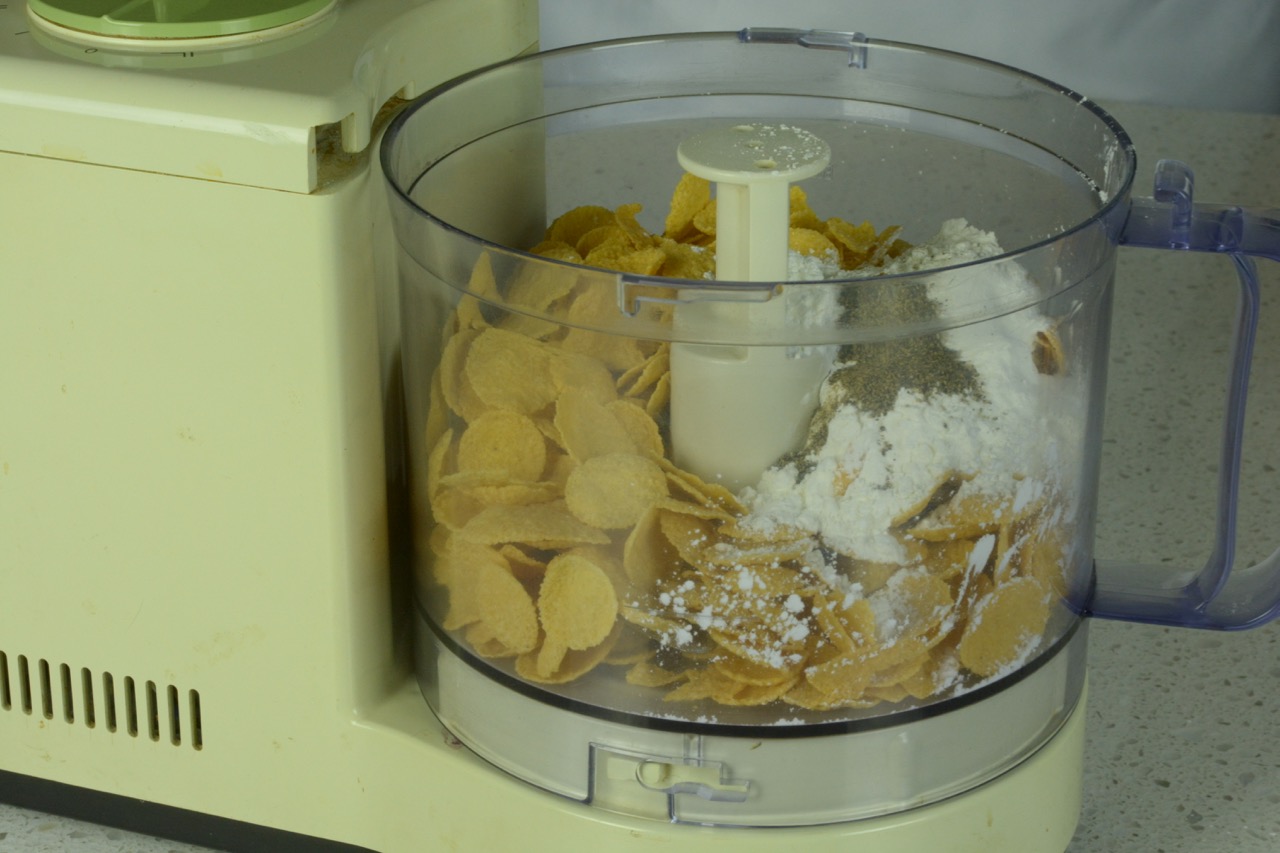
I use my food processor to crush the cornflakes. It’s always a toss up whether it’s worth washing the food processor bowl or doing the job by hand. In this case I go for using the processor and throwing away one less plastic bag.
You can definitely make the cereal coating in a bag crushing it with a rolling pin. This is a great job for young kids, especially the ones who eat a lot of chicken strips.
Dry-Wet-Dry System for Breading
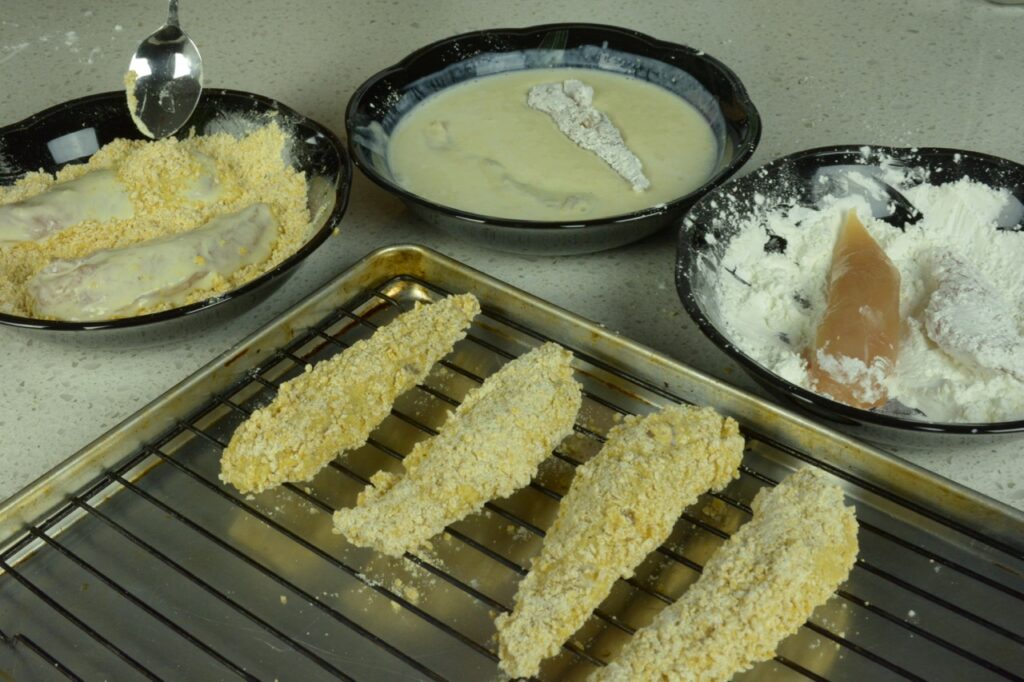
The rule for breading foods is DRY-WET-DRY. Start with meat (which is sort of wet) followed by three bowls.
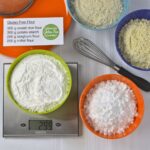
Bowl 1 is the first dry coating like cornstarch, tapioca starch or flour.
Bowl 2 is wet. The liquid can be a combination of eggs, cream, milk or buttermilk that is often seasoned.
Bowl 3 is the final dry breading. For this recipe I use gluten free cornflake cereal with cornstarch but this final breading can be gluten free breadcrumbs, chopped or ground nuts, coconut or other crushed cereal.
What Makes Crispy Breading
No one wants soggy breading so transfer your cooked food onto a wire rack set on a plate or baking sheet. I don’t think it’s necessary to blot them on paper towel but if you do, don’t leave them there. Anything breaded will steam and become soggy if left covered or sitting on paper towel.
Buttermilk helps the cornflakes stick to the meat and letting it rest for ten minutes allows time for the cornstarch to absorb moisture and form the thick coating.
3 Tips for Gluten Free Breading
I love efficiency in the kitchen and organization is the key that makes cooking look easy.
Tip #2 is to make the same recipe over and over. Simply making a recipe three times creates some kind of memory. You intuitively know that your kitchen has the basic ingredients and what you might need to buy. You also know the set up; the dishes you need and how it flows.
Tip #3 is planning ahead. I always make the whole recipe for cornflake breading, even if I don’t need all of it. Sometimes I even make a double recipe since I always want extra on hand for any breading job I might have.
Don’t under estimate the value of these three simple tips.
Organization for a Gluten Free Kitchen
Every kitchen needs a few tools and for this recipe they’re just the basics every kitchen has, except maybe the cereal.
- Baking sheets
- Wire cooling racks
- Gluten free cornflake cereal such as Nestle's or Nature's Path.
I’d love to hear in the comments below what kind of breading you’re making and on what.
__________________________________________________________________________
New here? Subscribe and get your FREE resource, the tips I wish I knew when I started cooking gluten free.
Looking for more help with gluten-free cooking? Check out our Cooking Classes.
_________________________________________________________________________
More Gluten Free Breaded Recipes
- Calamari
- Sesame Baked Chicken – two ways to compare and find your favourite
- Breaded Pork Chops
- For more tips on gluten free breading check out this post, Gluten Free Breading Help.
Gluten Free Breading for Chicken
Ingredients
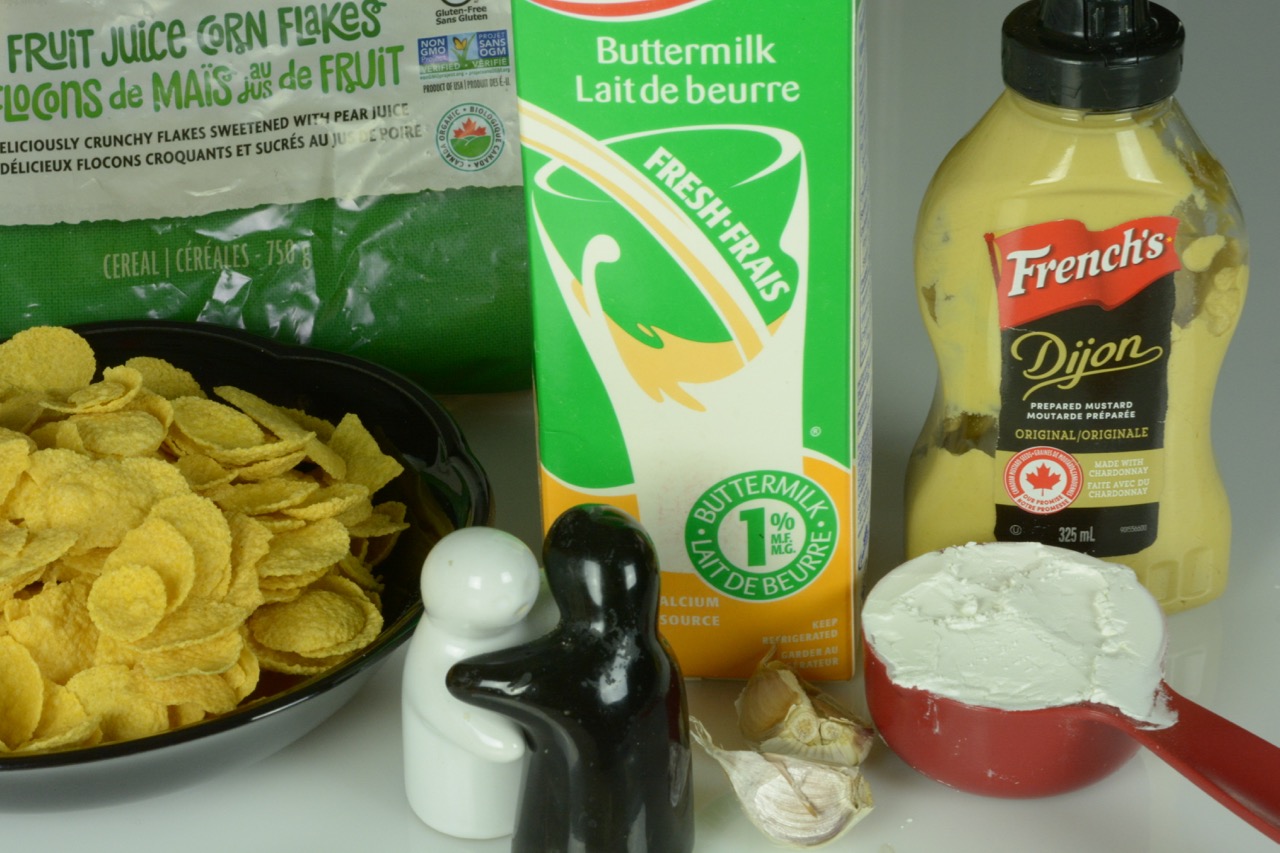
- 2 lb boneless, skinless chicken (chicken filets are easy to make strips)
- salt and pepper
- oil for frying
BOWL #1 - DRY
- ⅓ cup cornstarch
- salt and pepper
BOWL #2 - WET
- 1 cup buttermilk
- 2 tablespoon Dijon mustard
- 1 garlic clove, minced
BOWL #3 - DRY: Cornflake Breading
- 3 cups gluten free cornflake style cereal
- ⅓ cup cornstarch
- ½ teaspoon salt
- ½ teaspoon pepper
SERVING
- 1 lemon, cut in wedges
Instructions
- Set chicken on a plate. Sprinkle both sides with salt and pepper.
- Set 3 shallow bowls next to the chicken for the breading assembly line.
- Place a wire rack on a baking sheet after the bowls for the breaded chicken.
Bowl #1
- Combine cornstarch, salt and pepper.
Bowl #2
- Combine buttermilk, mustard and garlic.
Bowl #3 (Cornflake Breading)
- In a food processor add cornflakes, cornstarch, salt and pepper. Process until breading is finely ground, 20-30 seconds. Transfer to bowl #3.
- In assembly line fashion dredge chicken strips in bowl #1, making sure to cover both sides of each piece doing 2-3 pieces at a time.
- Transfer chicken to bowl #2 turning each piece over to cover completely. Using your hands or tongs, lift each piece out of the bowl and let liquid drip off the chicken back into the bowl. Place on top of breading in bowl #3.
- Turn each piece and press into the breading to help it adhere to the meat using a spoon to help if needed.
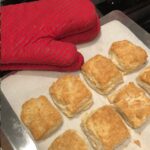
- Set breaded chicken on wire rack to rest while you complete the process for all pieces. Let rest at least 10 minutes.
- Chicken can be frozen at this point. Freeze in a single layer. Transfer to another container after frozen if desired.
COOKING
- Heat oil on medium-high heat in a large frying pan. Fry chicken in batches, cooking approximately 3 minutes per side, until golden brown.
- Can be placed in a warm oven until served. Place on wire rack so breading doesn't go soft, do not stack pieces.
SERVING
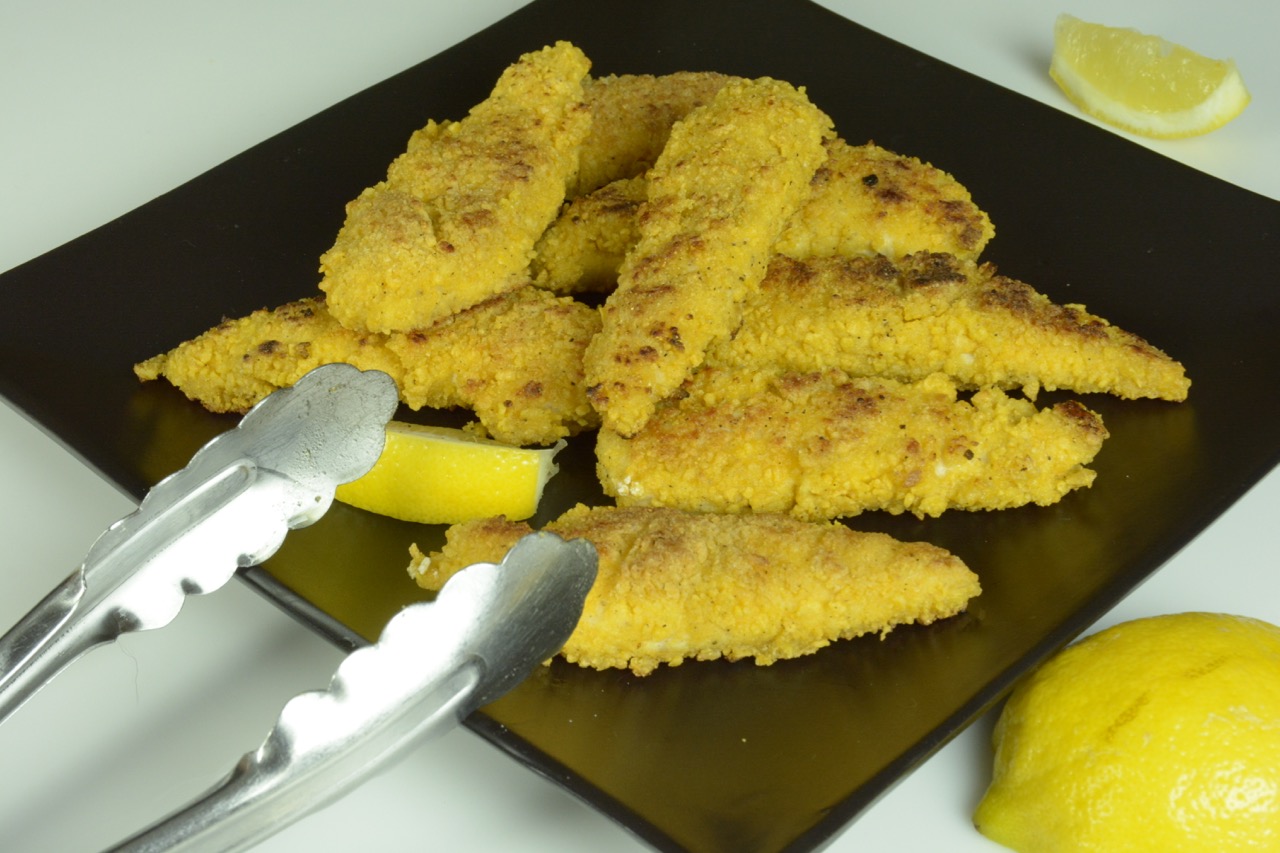
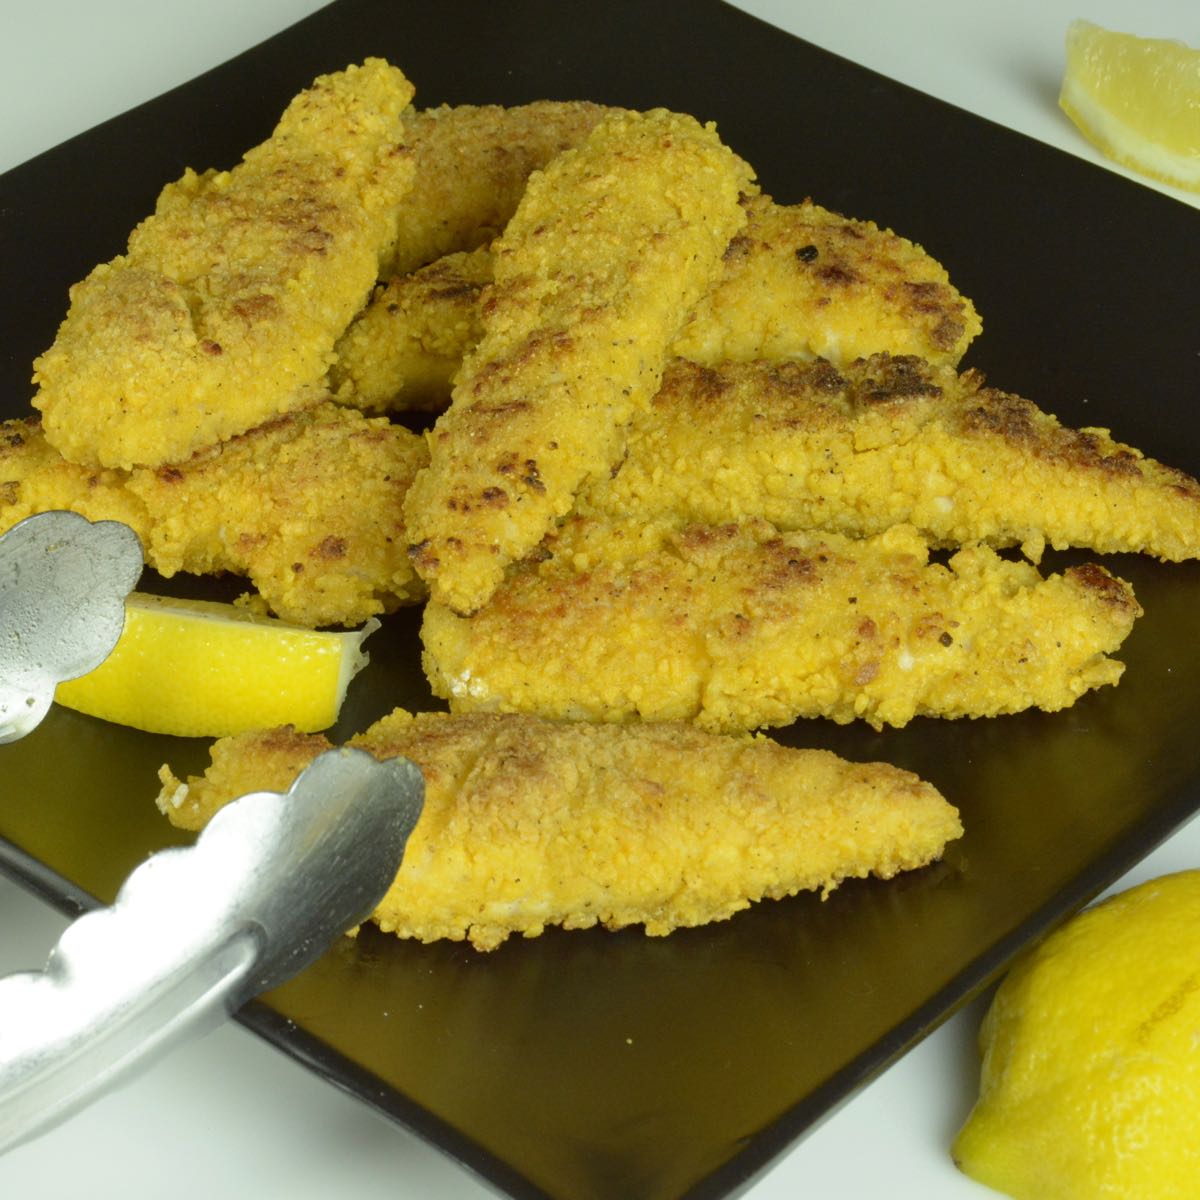
- Serve with lemon wedges or your favourite dipping sauce.


Leave a Reply