


Gluten free cooks want to know all the naturally gluten free desserts and crème brûlée is one of them. This Pumpkin Creme Brulee is a seasonal variation on that classic French dessert. Adventurous cooks have a blow torch in their kitchen because how fun it that. If you don't have one there's a great gift idea!
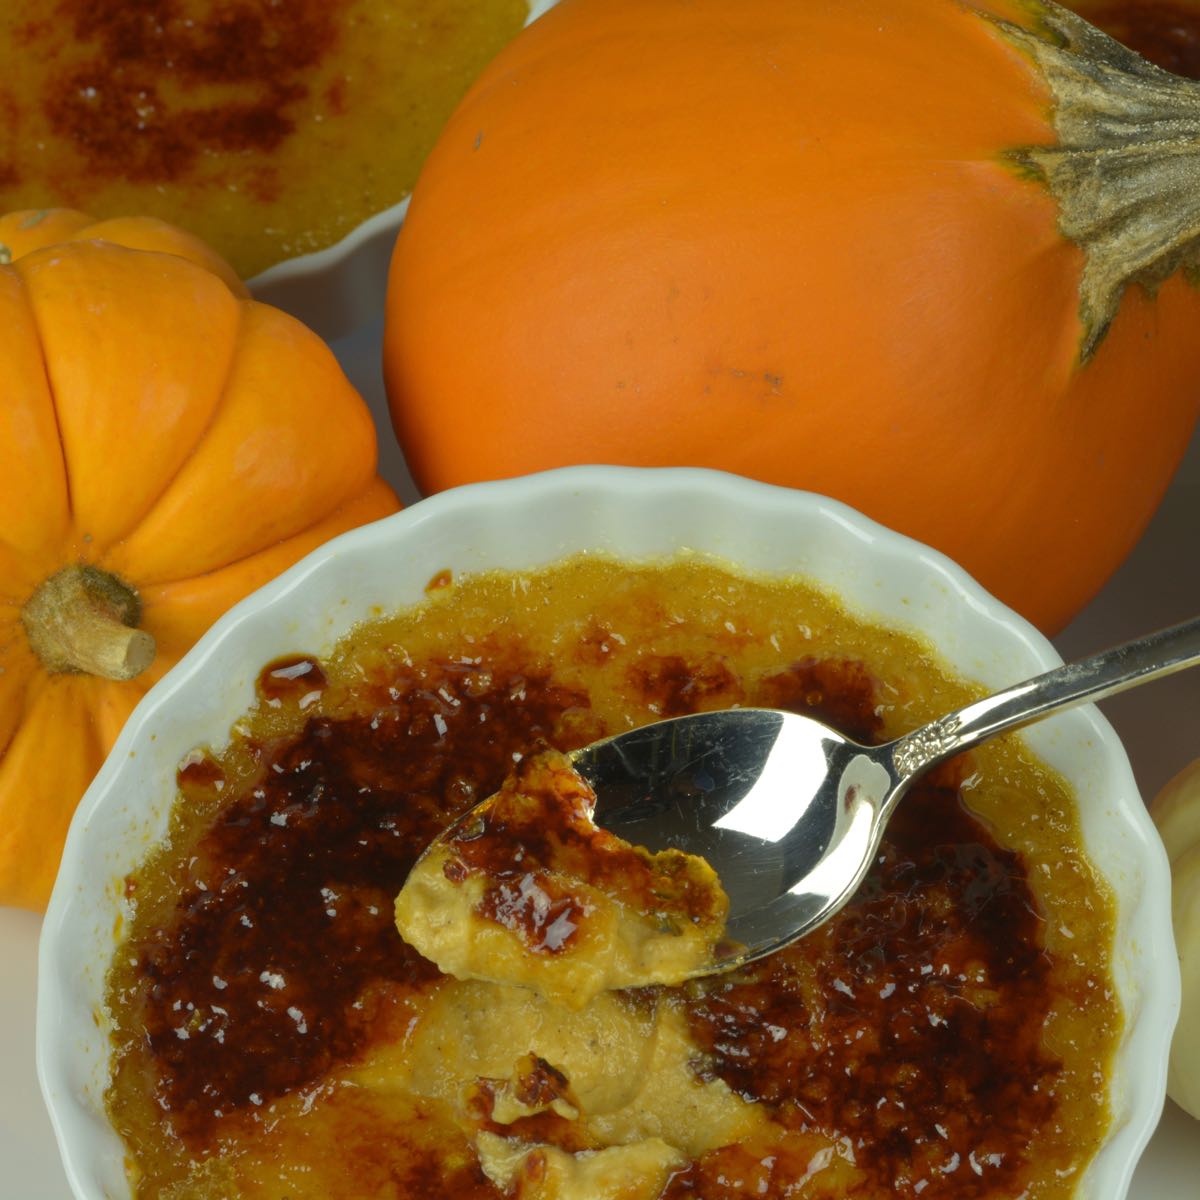
Gluten free cooks need a handful of reliable desserts that can be varied by the season. This claasic creme brûlée recipe is where it starts and this pumpkin version is the perfect fall version to go with any dinner, including the annual turkey dinner you make or attend.
Jump to:
Ingredients for Pumpkin Creme Brulee
The ingredients are simple, just make sure you're using pumpkin puree.
- Whipping cream, eggs and sugar - The basics for a classic creme brulee.
- Pumpkin puree - This is a single ingredient, it is not pumpkin pie filling. Check the label.
- Cinnamon - Gives the dish that pumpkin pie flavour.
See recipe card for exact amounts.
Instructions for Cooking in a Water Bath
Crème Brulee is cooked in a water bath. This method adds moisture to the oven that creates an even cooking temperature and prevents the dessert from cracking or becoming rubbery.
To create a water bath choose a large glass baking dish like you'd use for lasagna or a casserole. Fit your empty dishes into one or two baking pans so you know how they'll fit, sitting flat on the bottom.
Once your brulee is poured into the dishes you will carefully fit them into the large pans. I like to put the pan on the oven rack before I pour boiling water around them. Then they sit in a nice hot bath and slowly cook.
Instructions for Caramelizing Sugar
There is a technique to making the crisp, caramelized sugar shell that is the top of creme brulee. The trick is to use a kitchen blowtorch to melt and caramelize the sugar without burning it. Move the blowtorch in a circular motion in a small area watching the sugar melt while slowly moving across the entire surface. The motion helps prevent burning and takes a little practise.
Variations
Once you master the technique for caramelizing you can have fun making smores in the middle of winter or torching some leftover marshmallows on the top of a Cookie Pizza.
Get The Tools
- Gluten free eaters need to look for new ways to have fun with their food. Buy a kitchen blowtorch and play around with it. From flaming cocktails to Baked Alaska there are lots of ways to safely play with fire in the kitchen.
- Classic Crème Brulee dishes have low sides but come in a variety of shapes and sizes. These traditional low dishes are great for making a salted rim on fancy drinks and are little dishes that can be used for many tasks while cooking.
- Ramekins are handy in the kitchen for serving sauces and condiments but they are also perfect for crème brulee.
Top Tip for Creme Brulee
Do not refrigerate your brulee after caramelizing the sugar topping. Creme brulee can be made in advance but the caramel topping will soften if refrigerated. Make caramelizing the brulee part of the fun, there's always someone who wants to give it a try!
Pumpkin Creme Brûlée
Ingredients
- 1¾ cups whipping cream
- 3 large eggs
- ½ cup sugar
- 1 cup pumpkin puree not pumpkin pie filling
- ¼ teaspoon ground cinnamon
- additional sugar for caramelizing
Instructions
- Preheat oven to 300°F.
- Heat cream in a saucepan until hot but not boiling.
- In a separate bowl beat eggs and sugar.
- Gradually whisk the heated cream into the egg/sugar mixture whisking constantly to prevent the eggs from cooking.
- To ensure a silky smooth custard strain the mixture as you pour it back into the pot.
- Return to the heat. Add pumpkin and cinnamon stirring until combined.
- Pour custard into 6-8 individual crème brulee dishes or ramekins that are sitting in large baking dishes.
- Carefully pour boiling water into the baking dish to come almost half way up the side of the ramekins.
- Bake in preheated oven until the center of the custard is set; 30-35 minutes for shallow dishes, 35-40 minutes for deeper ramekins.
- Remove crème brulee from water bath and cool.
- Cover and chill. Can be made to this point a day in advance.
CARAMEL TOPPING
- Set dessert on the counter for 15-30 minutes. Sprinkle 1-2 tablespoon sugar evenly over custard. Caramelize sugar with a blowtorch or broiler (instructions follow)
BROILER METHOD
- Preheat broiler. Set custard under broiler as close to heat as possible. Broil until sugar is browned but not burnt, about 1½ minutes. Serve as soon as the caramel has hardened.
BLOWTORCH METHOD
- Holding the dessert in one hand and the blowtorch in the other use the blowtorch to make circular movements over the sugar. When the sugar starts to bubble tilt the dish to try and cover the entire surface with a caramel layer. Let caramel harden for a few minutes. Serve.
Notes
Nutrition
Recipe FAQ's
Yes, you can freeze canned pumpkin. Thaw pumpkin in the fridge overnight and use it to make pumpkin chocolcate chip cookies, pumpkin spice cookies, muffins, cake, pancakes, soup and more.
__________________________________________________________________________
New here? Overwhelmed or frustrated with gluten free? Learn a little bit about gluten free flour with this guide and start cooking GF food everyone wants to eat.
🎉 Exciting news! Adventures in a Gluten Free Kitchen, is a low cost way to learn to cook with help and encouragement from everyday cooks who get it.
_________________________________________________________________________
Leave a Reply