

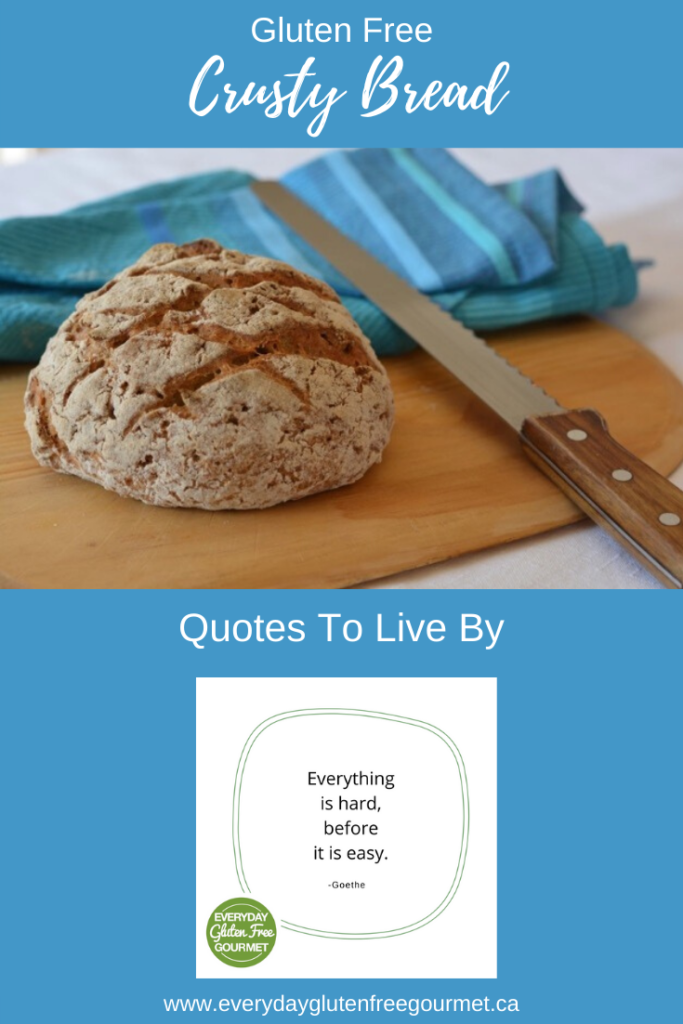

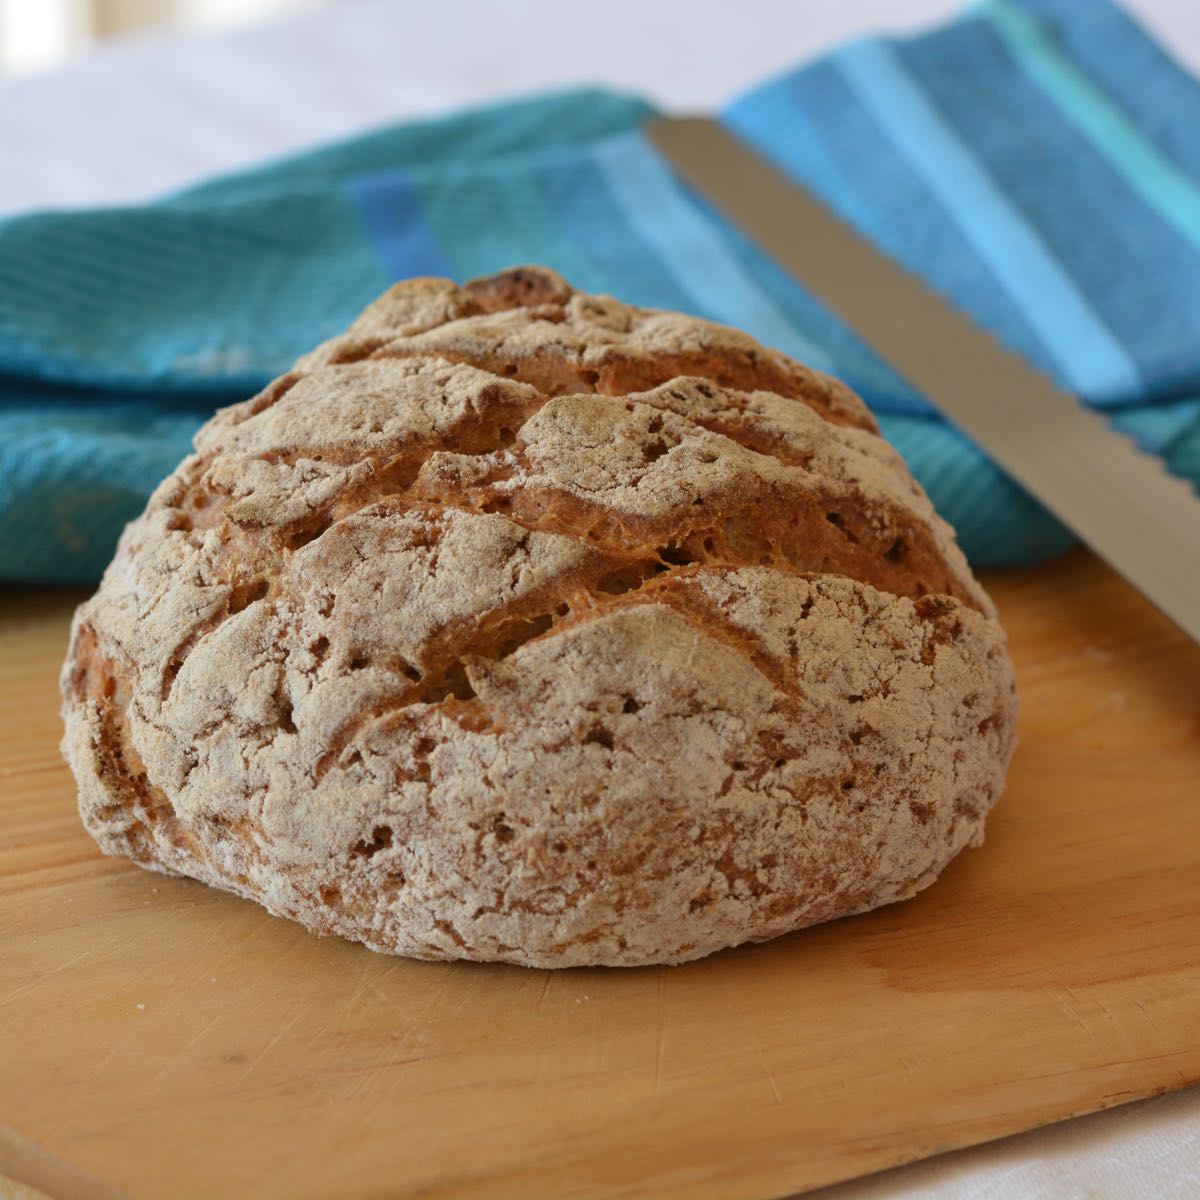
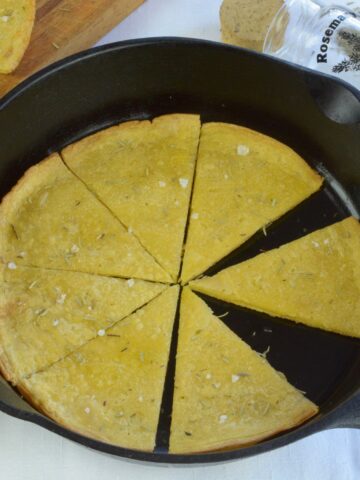
This rustic round of gluten free Crusty Bread is called a boule, but it can also be made into a loaf. You can learn to make gluten free yeast breads as long as you are willing to learn a few new things. People around the world are baking gluten free bread every day and you can be too.
Are you ready for a slice of warm bread with a bowl of homemade chili with beans or a hearty leek and split pea soup? Or maybe that fancy French sandwich called Croque Monsieur. Then you're ready to make this yeast bread. Even if you've never made bread, I guarantee you can make this and it will be better than many you can buy. This is just the beginning.
Jump to:
Ingredients
Gluten free yeast breads are best made with individual flours measured by weight. Everyday flour blends, called all-purpose or cup-for-cup, are too starchy. They work in many everyday recipes, like muffins and pancakes, but don't give the best results in yeast breads.
- Tapioca starch
- Brown rice flour
- Sorghum flour
- Potato flour - This is not the same as potato starch.
- Active dry yeast (ADY) is dissolved in warm water before use and creates the rise in yeast breads. It can be activated in a small amount of water or the full amount of water in any recipe.
- Xanthan gum - This is the glue that adds structure to gluten free baking. It seems expensive but is used in tiny amounts so just buy it. If you can't tolerate binders or want to bake without them you will want to learn about the options for substitutions.
- Eggs - helps add structure to bread.
See recipe card for exact amounts.
Instructions: Baking with Weight Measurements
Baking with weight measurements is the most accurate, therefore gives the most consistent results. In case you're just starting with yeast breads, I included cup measurements in this recipe because I first made it when I was fairly new to gluten free.
For more on this topic check out my post, Gluten Free Baking By Weight. When you bake gluten free you're going to use and measure more ingredients than anyone baking with wheat flour. It's not hard, it's just a mindset. So add a digital scale to your wish list.
Organize For Success
Organizing baking ingredients, including many flours, is step number one to decrease frustration in the kitchen. It takes time but it will pay off in the long run.
What is a Boule
You can make this bread in a loaf pan if you want to slice it for sandwiches. I wanted to taste it dipped in extra virgin olive oil and good quality balsamic vinegar so I formed it into a ball. This free form ball-shape is called a boule after the French word for ball. It refers to a rustic loaf of bread that has been leavened with yeast.
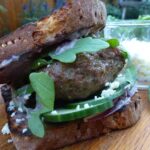
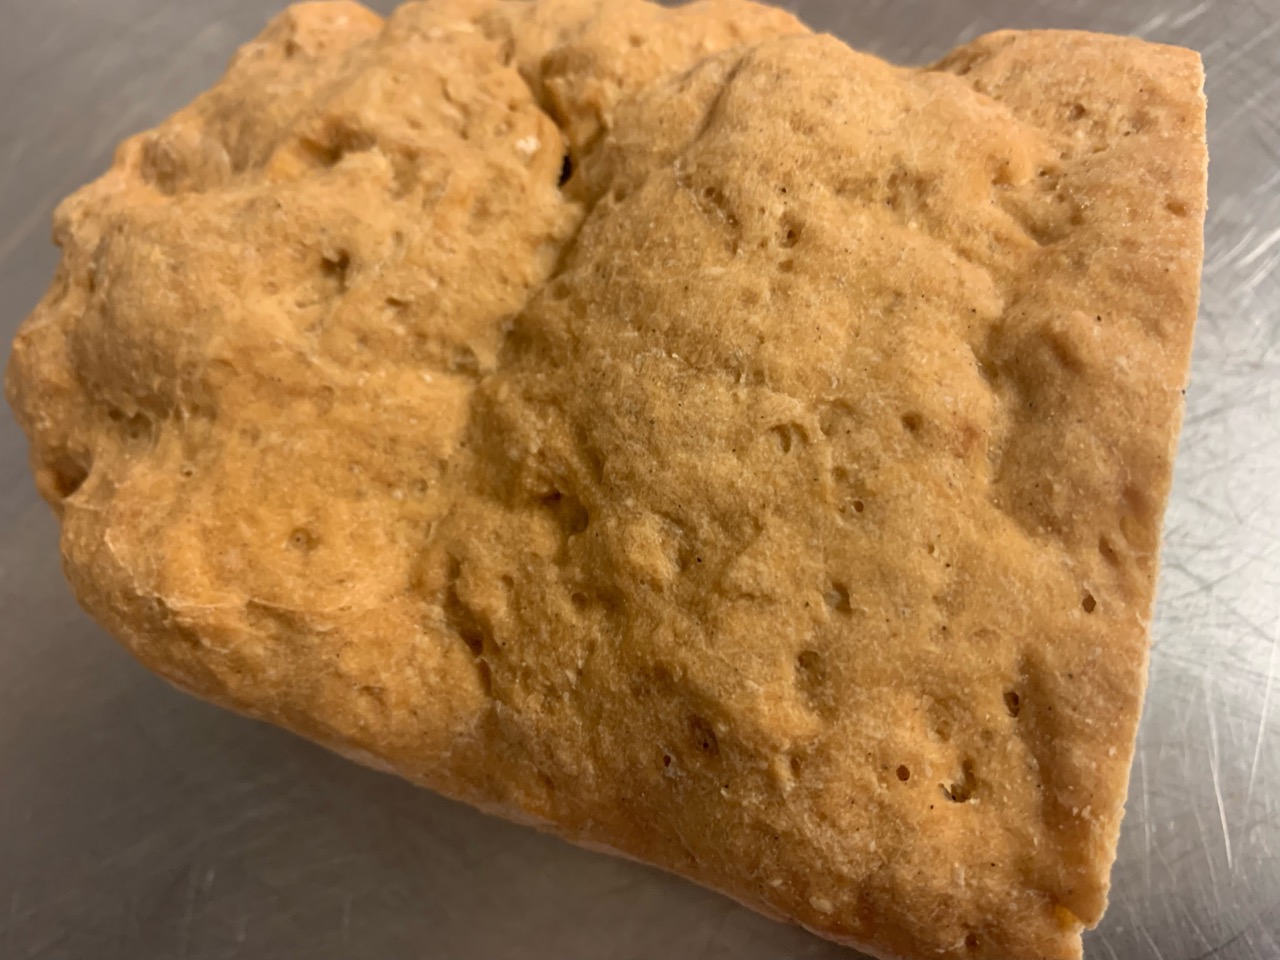
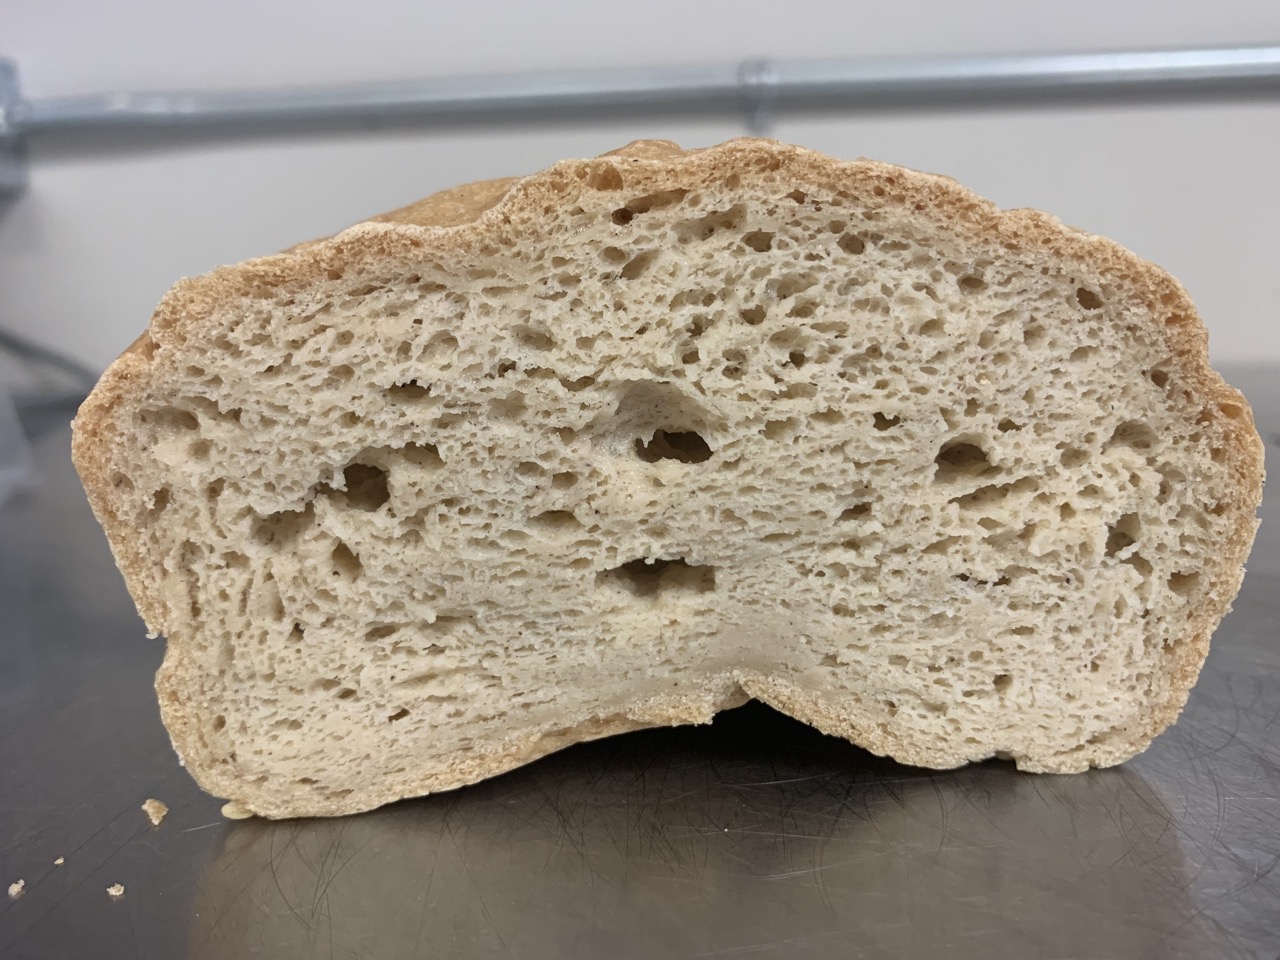
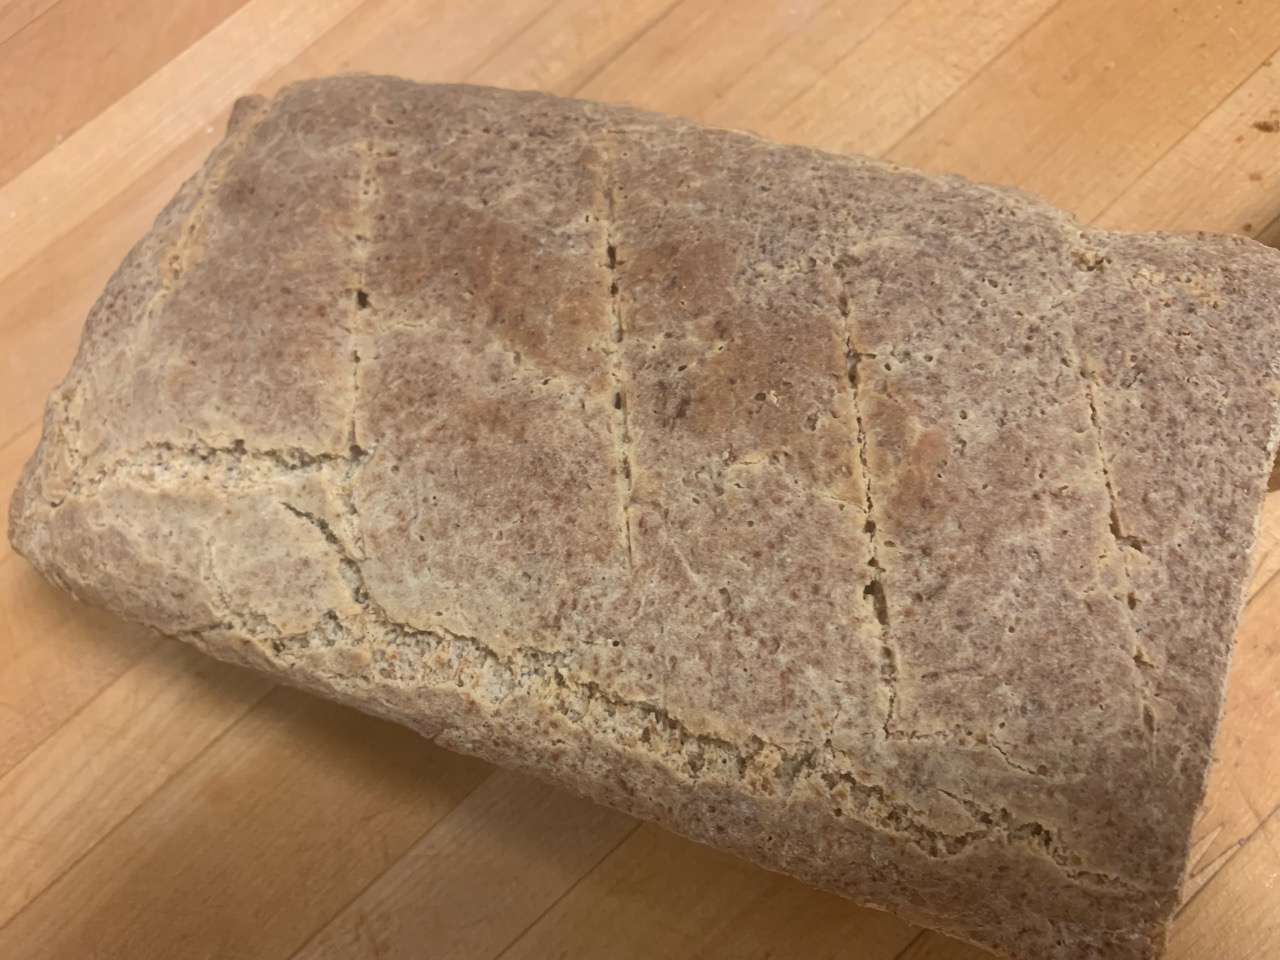
Follower Photos
Thanks to Brad for these pictures of his first attempt at this Crusty Bread recipe.

Top Tip
To improve your baking learn more about gluten free flours, starches and binders. Check out my 12-part series covering 21 ingredients gluten free cooks can use. Or join my virtual cooking class, How To Use Gluten Free Flour.
Gluten Free Crusty Bread
Ingredients
- 1½ cups tapioca starch (193 grams)
- ½ cup brown rice flour (77 grams)
- ¾ cup sorghum flour (77 grams)
- ⅓ cup potato flour (not potato starch) (57 grams)
- 1 tablespoon active dry yeast
- 2 teaspoon salt
- 2 tablespoon xanthan gum
- 1½ cups lukewarm water (100°F)
- 2 large eggs lightly beaten
- ¼ cup melted butter
Instructions
DRY INGREDIENTS
- Combine flours, yeast, salt and xanthan gum together in a large bowl. Whisk to break up lumps and combine evenly.
WET INGREDIENTS
- Combine wet ingredients in a stand mixer with paddles. Gradually add the dry mixture continuing until it is all incorporated into dough. Using wet hands and a spatula dump the dough into a large bowl. Cover with a tea towel and let rest until the dough rises, approximately 2 hours.
- At this point the dough can be refrigerated overnight.
- Using wet hands form the dough into a ball shape. Place on a piece of parchment paper on top of a cutting board and let rest for 1 hour, loosely covered with plastic.
- Set the oven racks so you can place a metal pan with water under the bread. Preheat the oven to 450°F and place a baking stone on the middle rack.
- Dust the top of the bread with brown rice flour and make hash marks with a sharp knife.
- Transfer parchment and bread onto the preheated baking stone.
- Pour 1-2 cups of boiling water into the metal baking pan and place underneath the bread.
- Bake for 50-60 minutes or until nicely browned and firm. Cooking times will need to be adjusted for the size of your loaf and temperature of your oven.
Notes
Nutrition
__________________________________________________________________________
New here? Overwhelmed or frustrated with gluten free? Learn a little bit about gluten free flour with this guide and start cooking GF food everyone wants to eat.
🎉 Exciting news! Adventures in a Gluten Free Kitchen, is a low cost way to learn to cook with help and encouragement from everyday cooks who get it.
_________________________________________________________________________

Sherrie McCarty
Hello, new to GF baking and trying to find a good bread recipe. Have you ever used a digital thermometer to check the bread temperature to know it’s done or just the 50-60 minutes? I see some recipes say 190-205 temperature for the bread to be done. Thank you.
Cinde Little
Hi Sherrie! Yes I use a thermometer and go for an internal temperature of 210F. I also record the time for each individual yeast bread recipe so I know what works with that recipe in my oven. Since gluten free baking often has extra liquid to make up for the flours used the cooking time can be longer than you expect. Lastly, the cooling time is equally important since baked goods right out of the oven can taste gummy making you think they are under done. In a cooking class making my recipe for pull-apart dinner rolls the group decided a full 15 or even 20 minutes of cooling resulted in the best texture. I hope that helps and feel free to come back and let me know what you learned.
Mj
Well, my baking stone literally broke into pieces while cooking this. Will never do that pan with water underneath ever again. That was expensive bread :(.
Cinde Little
I'm sorry to hear that MJ. Over time baking stones do break, I've had a few break myself but never figured out why. I've heard of baking stones breaking from people putting ice cubes on them to create steam, but not from indirect steam in the oven. Anyway, I'm always sorry to hear of baking disappointments. I hope you have a baking win in your kitchen very soon!
Sara
This looks good but I need to sub eggs due to allergy. I’m guessing psyllium husk might work?
Also, I’m going to make your flour blend soon. Do you have a bread recipe that I could use with that one as well? My hope is to have a quick premade blend (like yours) to throw in with other ingredients to make bread on the fly! Unfortunately I’m egg and dairy free as well as gluten free so it’s a challenge Thanks! Glad to find your site.
Cinde Little
Hi Sara. I'm not sure if egg replacer or psyllium husk powder would work better but you can try either. I do not have a flour blend to recommend for breads but you just gave me an idea. I have my 11 Gluten Free Flour Blend Recipes table posted and they are essentially All-Purpose gluten free flours. The don't work in everything but I'd say those blends work in 80% of the recipes most people make. I've recently done a deep dive into flour blends for cookies plus more research for a customer wanting to make flatbreads (GF DF corn free, soy free and more). I'm still working with this person so I will do the same investigation for bread flour blends s and get back to you on that. Happy baking!
Kate
So good and easy. Baked at 10,000’ and it was still perfect
Cinde Little
Thanks for sharing that Kate! I'm at 3500 ft so I'm glad to hear it worked at your altitude. Happy baking!
Vee Miles
Hi Cindi, came across your site a few days ago and like many of your hints and tips. I’ve been GF for some time and I am constantly trying new blends and recipes. One of the ingredients I incorporated, but have stopped is potato flour, as I was unable to buy it in my country (Australia). I did the hydration bit, but in the end it was just too much trouble. I now bake without it. Just came across this recipe of yours and I’m always willing to try something new, so wonder what you can use in replacement for the potato flour?
Cinde Little
Hi Vee! Gluten free cooks always need substitutes so here are a few things you can use in place of potato flour. Mashed potatoes is often suggested and would probably work well in a bread recipe. I think a flour is more what you're looking for in this recipe so try tapioca starch or cornstarch would be a good alternative. I find that recipes combining starches work better than using a large amount of starch in any single recipe. Since this recipe already has a good amount of tapioca starch I'd try cornstarch or even rice flour. The challenge with substitutes is that you need to try and keep trying to find what works for you. All the best and let me know how it turns out.
Phyllis
Cinde-just made the dough and it has risen nicely. If I put in refrigerator overnight and then put in a 9x5 loaf pan-how long to leave out before baking? Thanks for always responding to questions
Cinde Little
Hi Phyllis. I haven't done that but I would recommend leaving the dough on the counter for 1 hour before baking it in the oven. I hope all goes well.
Alene
Hi! Here I am again. Cannot have a drop of rice. Do you have an idea to replace the rice flour. I know that this is bread, and changing an ingredient is difficult. Just thought I'd ask. Thank you and enjoy the rest of your day..
Cinde Little
Hi Alene! I haven't tried these substitutes but they are all considerations. You can replace brown rice flour with oat flour, sorghum flour or almond flour. Other substitutes for brown rice flour are tapioca starch or potato starch but we're not trying to make a light fluffy cake so I'd be inclined to try one of the first three. Best of luck and let me know how it turns out.
Carol
Do you know how it turns out using a bread machine?
Cinde Little
Hi Carol. I don't have a bread machine so I can't answer that for you. What I can tell you is that gluten free bread should only rise once so you'll need to override that setting if you have it. Also, gluten free recipes often have extra liquid to aid absorption and therefore may need a longer baking time. As long as you go at it with an open mind and keep good notes I'm sure you can learn to make it in your bread machine. Happy baking!
Brad
Hello,
If I wanted to make this in a loaf pan what instructions would you use for baking this bread? Would I still use the water, etc.?
Thanks
Cinde Little
Hi Brad! The actual cooking time for your loaf will depend on the size of your loaf pan. Divide the dough into 2 loaf pans if they're quite small. The internal temperature of cooked bread should be 190°F so check it with an instant read thermometer. These two tips are reason enough to make the same recipe several times to really perfect it. Finally, I would definitely add the water when you put your loaf in the oven. It creates steam and that helps your bread rise. Let me know how it goes and send me a picture.
Brad
Thanks Cinde and I’ll get back to you.
Brad
Hi Cinde,
I made the bread and although the taste was good the rise was not. It was left, covered with a tea towel, for just over two hours as suggested. I also had a pan of water in the oven (convection) as well.
Your insights would be appreciated.
Thanks and take care,
Brad
Also, how do I send a picture?
Cinde Little
Well done Brad, you made it! Rather than move on to another recipe since you liked the taste I always recommend making any recipe 3 times. We learn something and might even see slight differences even when we think we did every step exactly the same. Here are 3 suggestions to make this recipe work for you. 1) Try adding 2 tsp baking powder along with the yeast to get more rise. 2) Decrease the rise time if you think the dough has reached it's maximum sooner. It may have started to deflate. 3) According to America's Test Kitchen psyllium husk powder is the most effective binder for gluten free yeast breads. I came up with this recipe before I added psyllium husk powder to my pantry but if you're adventurous you could try it. The general guide is to replace 2 tablespoons of xanthan gum with 4 tablespoons of psyllium husk powder. As for sending a picture you have to email it to me and I'd love to see it. [email protected]
Rien
Hello. Can i substitute xanthan gum with psyllium husk? With same amount or not?
Cinde Little
Hi Rien. Psyllium husk powder in the best binder for yeast breads because it binds more effectively with water and bread dough has a lot of water. This then does a better job of strengthening the protein network so it can hold lots of gas and steam during baking. That's what makes the bread light. Breads made with xanthan gum will be dense and heavy. However, if you're keen to experiment then try it an see what happens. Some people like to do side by side experiments to see the difference themselves. 1 tsp xanthan gum = 2 tsp psyllium powder. If you're more interested in making really good yeast bread then you should buy the psyllium powder. Best of luck!
Margaret
How healthily is adding so much starch to a person diet? What does it do to their weight? Thank you p.s. yes I am gf not by choice
Cinde Little
Hi Margaret, I think you know that adding more starch to your diet is not a healthy choice. As a general statement we all eat too many carbs; bread, baked goods, pasta, rice, potatoes and more. Many people who go gluten free slowly move away from all those high carb foods and incorporate more healthy whole foods into their diet. They probably cook more and eat better as a result. Yet they also want to enjoy all the foods they ate before a gluten free diet. That might be biscuits, pizza, quick breads, muffins, pancakes, cookies and on and on. A healthy diet is always a balance of whole foods and treats. There are lots of gluten free choices available now but most replacement items are less healthy than their gluten filled counterparts. For bread lovers out there they can learn to make all kinds of GF bread and choose ingredients that have a bit more nutrition, but I don't think bread is ever going to be at the top of a list of healthy foods. Weight is a different topic since some people gain weight after going gluten free (as their body is able to absorb nutrients from the food it gets) while others maintain or even loose weight. So if you're going to bake some bread I say make what you like and enjoy every bite!
Kate
Hello! I can't wait to try this recipe. Have you ever baked the loaf in a double dutch oven?
Cinde Little
Hi Kate. I don't have a double Dutch oven but I'm sure the bread will bake nicely in one.
Sam
Hey! What can I substitute the egg with as my son has an egg allergy too
Cinde Little
Hi Sam. I haven't used egg replacers myself but these are the 3 most common ones I see. I hope one of them works out for you!
1 egg = a rounded 1/2 Tbsp dry egg replacer powder + 2 Tbsp filtered water
1 egg = 1 Tbsp ground flax seed + 3 Tbsp filtered water
1 egg = 1 Tbsp chia seed + 3 Tbsp filtered water
Happy baking!